-
Stopping a click event without breaking your turbostream
In a Rails application I have a link that has various elements within it. Some of those elements are actionable on their own while others are such that I want them to open the parent link when clicked. The elements that are actionable should not open the parent link when clicked. The link, among other things, renders a turbostream.
<%= link_to edit_task_path(task.id), data: {action: "click->drawer#showDrawer", "turbo-stream": true}) do %>
  <div>
    <%= render ButtonComponent.new(data: {"action": "click->selectable-table#select"}) do %>
      <% render IconComponent.new(name: "check_box") %>
    <% end %>
  </div>
  <div>
    <span><%= task.title %></span>
  </div>
<% end %>
As this code currently stands, clicking on the task title will open the link to the edit task path. Good. Clicking on the check box will fire the select method from the selectable-table stimulus controller. Also good.
But clicking on the check box will also open the link to the edit task path. Bad. This happens because a click event bubbles or propagates up to the parents of the element on which the click occurs. So, we need to stop that propagation.
Helpfully, stimulus provides an option that can be appended to actions that will prevent those actions from propagating: the :stop option (for .stopPropagation()).
<%= render ButtonComponent.new(data: {"action": "click->selectable-table#select:stop"}) do %>We click on our check box and…the link is still opened but now the turbostream that the link was supposed to render is broken. Something in the way that turbostream works involves an event that needs to propagate to work. That in and of itself shouldn’t be an issue since we only care about what turbostream is doing if the link is opened and the link shouldn’t be opening. Why is the link opening?
Because there are actually two different events firing when I click the check box: a click event and a link click event. The important thing to know about these events is that the click event, but not the link click event, doesn’t bubble up if the :stop option is appended to the stimulus action. To stop the link click event, you also need to append the :prevent (for .preventDefault()) to the action.
<%= render ButtonComponent.new(data: {"action": "click->selectable-table#select:stop:prevent"}) do %>Now when I click on the check box, the select method from the selectable-table stimulus controller fires but the link does not open. Success!
You can read more about the difference between .stopPropagation() and .preventDefault() here.
-
Action Cable: simple implementation
Action Cable is a framework to allow multiple clients to receive seamless, simultaneous updates from a Rails server. If you have an application where changes submitted by one user should be seen immediately by all users without a refresh, Action Cable might be the solution you’re looking for.
In my case, I was developing a two to four player variant of Chess where all players needed to be able to see every move made by the other players. Since all players are being served by the same server, they could see the new state of the board by refreshing their page, but that is clearly not an ideal way to handle the issue.
Action Cable integrates WebSockets into an application. WebSockets are a way to establish a real time connection between the client and the server where changes on the server-side are reflected on the client-side without any initiating action on the part of the client.
installation
If you’re using the newest version of Rails, it comes loaded with Action Cable from the start, so there’s nothing you need to do on the server-side initially.
In my case, I was building the front end with JS/React. To install action cable for a JavaScript app run from the command line:
npm install actioncable --saveserver-side setup
In your rails app you’ll find a directory called “Channels”. This will be where you’ll do the server-side setup for Action Cable.
First, add a directory within /Channels called “application_cable”. Move the file “channel.rb” into that directory. After that, you can leave that file alone.
Second, create a new file in /Channels to handle the specific connections you want to server. You can think of a channel as a particular stream transmitting selected data from the server to the client. Many clients can subscribe to the same channel and receiver that data-stream. You can also set up many channels to control which data gets sent when. For this demonstration, we’ll just set up one channel, which I called “game_channel.rb”.
Inside this file, you’ll set up your specific channel:
class GameChannel < ApplicationCable::Channel

  def subscribed
    stream_from "game#{params[:id]}"
    game = Game.find(params[:id])
    ActionCable.server.broadcast("game#{game.id}", game)
  end

end
Let’s break this down a bit. This file defines the class GameChannel, which inherits from the Channel class in the ApplicationCable module, which in turn inherits from the ActionCable channel base.
In this class we have created the instance method “subscribed”. This dictates what should happen when a client subscribes to this channel. First, the name of the particular subscription is established. In this case, it is “game” followed by the id number of the game, e.g., “game3”. This is how this stream will be referenced in other parts of the app.
Next, we indicate what should be done when someone subscribes to this channel. In this case, the relevant game is found and broadcast on the relevant channel. This data will be received on the client-side and handled from there.
But we don’t want to send data just when a user subscribes to the channel. We also want to send it whenever anyone makes a move. To do this, we need to include broadcaster inside the relevant controller, in this case, the BoardsController:
def move_piece
    board = Board.find(params[:board_id])
    game = board.game
    players = game.players
    if players.map{|player| player.user_id.to_i}.include?(session[:user_id])
      legal = board.move_piece(params[:start_loc], params[:end_loc], session[:user_id])
      if legal
        board.fill_camp
        game.advance
        package = game.package
        ActionCable.server.broadcast("game#{game.id}", package)
        render json: package, status: :accepted
      else
        return render json: { error: "Illegal move." }, status: :not_acceptable
      end
    else
      return render json: { error: "Not authorized" }, status: :unauthorized
    end
end
There’s a fair amount going on here that’s specific to this game. The important thing to notice is that, once authentication and validation is complete, the same data that is rendered to the client who made this request is broadcast to any client that is subscribed to the relevant game channel.
Anywhere you want to broadcast server-side changes to all subscribers, simply include
ActionCable.server.broadcast("channel-name", data).The last thing you need to do on the server side is establish a route for subscription requests:
#actioncable routing

mount ActionCable.server => '/cable'
client-side setup
In your React app, create a directory called “Channels” within /src. Inside that directory, you’ll need to create the file “index.js”:
import * as ActionCable from '@rails/actioncable'
window.App || (window.App = {});
window.App.cable = ActionCable.createConsumer();
Next, determine what component of your app is best suited to handle the subscription. For my app, it is the Games component. Whenever a player selects a game, they subscribe to the channel for that game:
import { createConsumer } from "@rails/actioncable"
...
function Games({}) {

  const [cable, setCable] = useState(createConsumer('ws://localhost:3000/cable'));
  const [subscript, setSubscript] = useState({});

  function subscribe() {
    const sub = cable.subscriptions.create({
      channel: 'GameChannel',
      id: selectedGame
    }, {
      connected: () => {
        const identifier = JSON.parse(sub.identifier);
        console.log(`Connected to the channel: GameChannel   ${identifier.id}`);
      },
      disconnected: () => {
        const identifier = JSON.parse(sub.identifier);
        console.log(`Disconnected from the channel: GameChannel ${identifier.id}`);
      },
      received: async (data) => {
        const identifier = JSON.parse(sub.identifier);
        console.log(`Receiving data from channel: GameChannel ${identifier.id}`);
        setGamePkg(data);
      }
    });
    setSubscript(sub);
  };

  useEffect(() => {
    cable.subscriptions.remove(subscript);
    if (selectedGame !== "none") {
      subscribe();
    }
  }, [selectedGame]);
};
The subscribe function handles the creation of the subscription, reports whether the subscription was successful, and returns the broadcast data if it was successful.
Note that the address parameter for createConsumer should be whatever the address is for your Rails server.
Note also that when a subscription is created, it is stored in state. This state is then used to remove the subscription whenever a new game is selected.
Note also that the data delivered via the subscription is stored in the gamePkg state. It is then ready to be used in whatever way you see fit.
redis
You’ve almost finished setup. The last thing you need is to install and configure Redis. Redis is a data storage tool that acts as the middleman data cache between the the server and the client. Without Redis, Action Cable will not function.
To install Redis on your Rails app, run from the command line:
sudo apt-get install redisTo run the Redis server (which will need to be running while you use the app), run from the command line:
redis-serverFinally, check to make sure that your /config/cable.yml file is configured properly:
development:
  adapter: redis
  url: redis://127.0.0.1:6379

test:
  adapter: test

production:
  adapter: redis
  url: redis://127.0.0.1:6379
  channel_prefix: tunnel_brawl_production
My app is called “Tunnel Brawl”. You should name your channel_prefix appropriately.
conclusion
With the Redis server running, the Rails app running, and the React app running, you should be able to subscribe to Action Cable channels and get live updates whenever the relevant data on the server changes.
There’s a lot more that you can do with Action Cable and WebSockets, but I hope this is enough to get you up and running.
-
Friendship associations with rails
Let’s say we’re building an event scheduling application. We want our users to be able to form friendships with one another, create events, and invite friends to those events. Implementing these functions poses some interesting challenges when using Rails and Active Record. In this post I’ll work through those challenges.
It is worth noting up front that we don’t need to rebuild the wheel here. There are plenty of gems that will allow you to easily implement friendship relationships, including:
In this post, though, I’ll be building the friendship functionality from scratch. Also, for the sake of space, I won’t be building out the friend request or invitation functions in this post.
Users and Events
Our users can create events, so we’ll have at least two tables in our database: users and events. Each user can have any number of events and every event belongs to a user. So, our User and Event models might look like this:
class User < ApplicationRecord
  has_many :events
end

class Event < ApplicationRecord
  belongs_to :user
end
Recall, however, that we’re going to invite other users to these events. In addition to a user having many events, an event might have many users. This is a many_to_many relationship, so we need a join table and a corresponding model, Attendance, and we need to update our other models:
class Attendance < ApplicationRecord
  belongs_to :user
  belongs_to :event
end

class User < ApplicationRecord
  has_many :events
  has_many :attendances
end

class Event < ApplicationRecord
  belongs_to :user
  has_many :attendances
end
This will work, but it doesn’t make the associations particularly clear. It would be nice if we could find all of the events a user is attending by calling something like
@user.attendee_events, instead of@user.attendances.each {|attendance| attendance.event}.Normally, we would handle something like this with
has_many :through, but in this case we’ll have a conflict:@user.eventswill be ambiguous between events the user created and events the user is attending. It will default to whichever is stated later in the model. So, if the model looks like this…class User < ApplicationRecord has_many :events has_many :attendances has_many :events, through: :attendances end…then
@user.eventswill pull up the events the user is attending, but if the model looks like this…class User < ApplicationRecord has_many :attendances has_many :events, through: :attendances has_many :events end…then
@user.eventswill pull up the events the user created. Either way, we’ve lack the ability to easily call up one of the associations.Enter association aliasing. By giving the association between users and events an alias, we can distinguish between the attending relationship and the owning relationship. Here’s what it might look like:
class User < ApplicationRecord
  has_many :owner_events, class_name: 'Event', foreign_key: 'owner_id'
  has_many :attendances
  has_many :events, through: :attendances
end

class Event < ApplicationRecord
  belongs_to :owner, class_name: 'User'
  has_many :attendances
  has_many :users, through: :attendances
end
Now the event belongs to an owner, which Active Record will look for among the users, and a user can have many owner_events, which Active Record will look for among events where the foreign key, ‘owner_id’, matches the user’s id. Before this will work, however, we need to update our event migration:
class CreateEvents < ActiveRecord::Migration[7.0]
  def change
    create_table :events do |t|
      t.string :title
      t.references :owner, foreign_key: { to_table: :users }

      t.timestamps
    end
  end
end
Now the events table will include an owner_id attribute but Active Record will recognize that it refers to a user_id.
Once we have all this in place we can pull up the events a user is attending with
@user.eventsand the events they have created with@user.owner_events. Similarly, we can pull up the user who owns an event with@event.ownerand the users who are attending an event with@event.users.Let’s take this a step further. Instead of accessing the events a user is attending with
@user.events, let’s set it up so we can call them with@user.attending_eventsand instead of accessing the attending users for an event with@event.users, let’s set it up so we can call them with@event.attendees. This will make the usage for our application a bit clearer.First, let’s change our Attendance model:
class Attendance < ApplicationRecord
  belongs_to :attendee, class_name: 'User'
  belongs_to :attendee_event, class_name: 'Event'
end
We’ve given the user an alias of attendee and the event an alias of attendee event. Next, let’s make the necessary changes to the attendances migration:
class CreateAttendances < ActiveRecord::Migration[7.0]
  def change
    create_table :attendances do |t|
      t.references :attendee, foreign_key: { to_table: :users }
      t.references :attendee_event, foreign_key: { to_table: :events }

      t.timestamps
    end
  end
end
Now the attendance table will include columns for attendee_id and attendee_event_id but Active Record will know that they refer to users and events. Next, let’s make the necessary changes to the User model:
class User < ApplicationRecord
  has_many :owner_events, class_name: 'Event', foreign_key: 'owner_id'
  has_many :attendances, foreign_key: 'attendee_id'
  has_many :attendee_events, through: :attendances
end
No changes need to be made to the users migration for this. Next, let’s update the Event model:
class Event < ApplicationRecord
  belongs_to :onwer, class_name: 'User'
  has_many :attendances, foreign_key: 'attendee_event_id'
  has_many :attendees, through: :attendances, class_name: 'User'
end
As with the users migration, no changes need to be made to the events migration.
Great! Now our usage is pretty clear:
- Get a user’s owned events with
@user.owner_events - Get the events a user is attending with
@user.attending_events - Get the owner of an event with
@event.owner - Get the attendees of an event with
@event.attendees
Friendships
We’ll see some of the same moves we used above in developing the friending functionality of the application, but there are some additional challenges. First and foremost, since users are friends with other users, we will be creating an association between the User model and itself.
First, we’ll create a Friendship model and migration with
rails generate model Friendship.The friendship will belong to two users, the one who initiates the friendship and the one who accepts the friendship. We’ll call these the friender and the friendee, respectively. Here’s what our model will look like:
class Friendship < ApplicationRecord
  belongs_to :friender, class_name: 'User'
  belongs_to :friendee, class_name: 'User'
end
The friendships migration will look like this:
class CreateFriendships < ActiveRecord::Migration[7.0]
  def change
    create_table :friendships do |t|
      t.references :friender, foreign_key: { to_table: :users }
      t.references :friendee, foreign_key: { to_table: :users }

      t.timestamps
    end
  end
end
Finally, we need to update our User model:
class User < ApplicationRecord
  has_many :owner_events, class_name: 'Event', foreign_key: 'owner_id'
  has_many :attendances, foreign_key: 'attendee_id'
  has_many :attendee_events, through: :attendances
  has_many :friender_friendships, class_name: 'Friendship', foreign_key: 'friender_id'
  has_many :friendee_friendships, class_name: 'Friendship', foreign_key: 'friendee_id'
  has_many :frienders, class_name: 'User', through: :friendee_friendships
  has_many :friendees, class_name: 'User', through: :friender_friendships
end
So far, so good. If we want to know who has accepted a user’s friend requests we can call
@user.friendeesand if we want to know whose requests a user has accepted we can call@user.frienders. But what if we just want to know who a user’s friends are, irrespective of who friended whom? For that we can add a simple instance method to the User model:def friends() friendees = self.friendees frienders = self.frienders friends = friendees + frienders endNow if we call
@user.friendswe will get all the friendees and frienders of the user.Dependencies
We’re almost done; we just need to make sure things get cleaned up nicely when users, events, or friendships are deleted.
First, when an event is deleted the associated attendances should be deleted, too. This is easily accomplished in the Event model:
class Event < ApplicationRecord
  belongs_to :onwer, class_name: 'User'
  has_many :attendances, foreign_key: 'attendee_event_id', dependent: :destroy
  has_many :attendees, through: :attendances, class_name: 'User'
end
Next, when a user is deleted their friendships should be deleted, the events they created should be deleted, and their attendances should be deleted:
class User < ApplicationRecord
  has_many :owner_events, class_name: 'Event', foreign_key: 'owner_id', dependent: :destroy
  has_many :attendances, foreign_key: 'attendee_id', dependent: :destroy
  has_many :attendee_events, through: :attendances
  has_many :friender_friendships, class_name: 'Friendship', foreign_key: 'friender_id', dependent: :destroy
  has_many :friendee_friendships, class_name: 'Friendship', foreign_key: 'friendee_id', dependent: :destroy
  has_many :frienders, class_name: 'User', through: :friendee_friendships
  has_many :friendees, class_name: 'User', through: :friender_friendships
end
Finally, when a user unfriends another user, i.e., when a friendship is deleted, the relevant attendances should be deleted, too. The relevant attendances are any attendance where the attendee is one friend and the attendee_event is owned by the other friend.
This presents a problem. As it stands, the Friendship model has no associations with attendances. Let’s correct that. Since a user can only attend events that are created by their friends, every attendance can belong to a friendship. So, we can change the Attendance model and migration as follows:
class Attendance < ApplicationRecord
  belongs_to :attendee, class_name: 'User'
  belongs_to :attendee_event, class_name: 'Event'
  belongs_to :friendship
end

class CreateAttendances < ActiveRecord::Migration[7.0]
  def change
    create_table :attendances do |t|
      t.references :attendee, foreign_key: { to_table: :users }
      t.references :attendee_event, foreign_key: { to_table: :events }
      t.references :friendship

      t.timestamps
    end
  end
end
Finally, we change the Friendship model as follows:
class Friendship < ApplicationRecord
  belongs_to :friender, class_name: 'User'
  belongs_to :friendee, class_name: 'User'
  has_many :attendances, dependent: :destroy
end
Excellent! Now any attendances associated with a friendship will be deleted when the friendship is deleted. No ex-friends at your events!
For more fun with associations, check our Ruby on Rails: Association Basics.
- Get a user’s owned events with
-
Streamlining git commands with bash scripts
Over the last several months, I’ve cloned nearly two-hundred Github repos and pushed hundreds of commits. Every time I’ve had to clone a repo and open the resulting directory in two steps, every time I’ve had to add, commit, and push, I’ve thought, “There’s got to be a better way!”
And of course there is. By writing custom Bash scripts, you can clone a repo into a directory and open that directory with one command and run through the add-commit-push cycle with another.
I’m working with a Linux system and I’ll be writing this tutorial from that perspective.
.bashrc configuration file
A Bash script is a series of command-line interface commands called using a single command. For this tutorial, you’ll be writing your scripts in a new file and then importing those commands into your .bashrc file, which is the file that configures your cli. There are lots of cool things you can do with these configurations, but I’ll leave those for another time.
First, locate your .bashrc. This is a hidden file, probably in your home directory. As a reminder, to see hidden files, use the ls -a command. Once you’ve found that file, open it in your preferred editor.
Next, create a new file in the same directory as your .bashrc file. Name this file .bash_aliases and open it in your editor, too.
Scroll through your .bashrc file until you start seeing lines that begin with “alias”. Aliases allow you to rename commands or create new commands using scripts. You might see some interesting aliases here that you weren’t aware of. Poke around a bit.
Once you’re doing poking around, find a nice spot to insert the following:
# Alias definitions
source ~/.bash_aliases
This will import into your configuration file the scripts you write in .bash_aliases. Save your configuration file and switch over to .bash_aliases.
Clone and open
The first script you’ll be writing is one that will allow you to clone a repo and open the resulting directory with a single command.
The structure of your script will look like this:
function function_name () {
    commands
}
For example, if you wanted a script that said “Hello, world!” it would look like this:
function hello_world () {
    echo Hello, world!
}
Simple enough! One thing to note about writing Bash scripts is that you will not be naming parameters and then referencing those parameters within your code-block. Instead, you’ll be using the following convention:
$1 == first argument
$2 == second argument
$3 == third argument
...
So, if you wanted a function to say whatever argument you pass in, it would look like this:
function print_out () {
    echo $1
}
Ok, enough pre-amble. Let’s talk about the script we want to write.
This script will have three parts: first, it will call git clone on whatever ssh we pass into the command. Second, it will isolate the part of the ssh that determines the name of the repo’s directory and assign it to a variable. Third, it will call cd on that variable, thus opening the directory.
function gclop () {
    git clone $1
    local base="$(basename -s .git $1)"
    cd $base
}
Here’s what happens if we run the command:
gclop git@github.com:tloughrist/phase-3-deli-counter.gitFirst, git clone will be called on git@github.com:tloughrist/phase-3-deli-counter.git. This will clone the indicated repository.
Second, a variable will be created, called “base” that will be available locally, i.e., within the function. To this variable we will assign “phase-3-deli-counter” using “$(basename -s .git $1)”.
The syntax of the Bash script requires us to wrap the command in “$()”. Inside of that we find the basename -s .git command, which strips the directory and file extension off of whatever argument we call it on. In this case, we’re calling it on the first argument, $1, i.e., git@github.com:tloughrist/phase-3-deli-counter.git. The result is the assignment of phase-3-deli-counter to the variable base.
Finally, change directory will be called on base, which will open the directory phase-3-deli-counter.
One script down, one to go.
Add, commit, and push
This next script will also have three parts: first, it will call git add .. Second, it will call git commit -m. Third, it will call git push.
The only tricky bit here will be inserting the commit message.
function gacp () {
    git add .
    git commit -m "$1"
    git push
}
Here’s what happens when we run the command:
gacp first commitFirst, git add . is called on the current directory.
Second, git commit is called with the message “first commit”. Recall, $1 refers to the function’s first argument.
Third, git push is called on the current directory.
And that’s it. What once was three now is one. Save your files, open a new terminal window, and try out your new commands.
Conclusion
We’ve only scratched the surface on what you can do with custom Bash scripts. Check out these resources to learn more about Bash scripts and configurations:
-
Going beyond table data with Sinatra
Sinatra is a domain specific programming language designed to allow the HTTP request handling capacity of a web application to be built quickly and easily. Sinatra’s routes elegantly and eloquently combine an HTTP method, e.g., ‘get’, ‘post’, ‘patch’, and ‘delete’, with a URL matching pattern so that when the relevant HTTP request is made to the relevant URL, a block of code is executed.
Active Record is an object-relational mapper, linking the objects of a web-application to the data contained in the related database’s tables.
When I first began working with Sinatra and Active Record, I ran into a problem: I could easily get the data contained in my database’s relational tables but I didn’t know how to get other data related to the app, e.g., the return values of a model’s methods.
I’ve since learned two ways to solve this problem and I thought it might be helpful to run through them together in one post.
Getting Table Data
Let’s say you’re creating an app to keep track of basketball games. It would make sense for the app’s database to include a table of matches and a table of players. Each match has many players and each player has many matches, so these tables stand in a many-to-many relationship. This means we’ll have a third table, a join table, to mediate this relationship. Let’s call it the player_match table.
Here’s what your tables might look like:
PLAYERS id name height MATCHES id date court PLAYER_MATCHES id player_id match_id team points_scored To get the data from these tables, you’ll need an application controller to set up the http request routing. This is what your application controller file might look like:
class ApplicationController < Sinatra::Base
  set :default_content_type, 'application/json'

  get '/players' do
    players = Player.order(:name)
    players.to_json
  end

  get '/matches' do
    matches = Match.order(:date)
    match.to_json
  end

  get '/player_matches' do
    player_matches = PlayerMatch.order(:player_id)
    player_matches.to_json
  end

end
Each of these routes will deliver a JSON formatted object when an HTTP request is made to the correct URL. The object will contain all data on the tables of the instances of the Player, Match, and PlayerMatch classes respectively.
If there are circumstances where you don’t need to return all the data on a table, you can write routes that are more selective:
get '/players/:id' do
    player = Player.find(params[:id])
    player.to_json
  end
This route will return only the data on the player with the id specified in the URL.
But what if you want information that is derivable from the data on the tables, but which isn’t included in the tables? What if, for example, you wanted to know which team won a particular match?
Reasons for server-side processing
You could store all the data from the tables on the client-side and carry out your calculations there. But there are some problems with this approach.
First, it’s inefficient. If you want to know which team won a match, you’d need to get all the data from the player_match tables to work with. If there have been hundreds of matches, each with at least ten players, you’d be getting data on thousands of PlayerMatch instances, almost all of which is unnecessary for the current task.
Second, it is insecure. The user will have access to any data returned from an HTTP request. If there is sensitive data on a table, then sending all the data from the table is not an acceptable option.
Third, if large chunks of data are being sent from the server to the client, the chances of this transfer being interrupted, e.g, by driving through a tunnel, increase. This would prevent from the operation being completed at all.
So, it would be good to do the processing on the server side if we can.
Attaching methods to table data
Let’s say we’ve written an instance method for the Match class,
.winner, to return the name of the team that won the match. The class might look like this:class Match < ActiveRecord::Base has_many :player_matches has_many :players, through: :player_matches def winner teamA = self.player_matches.select {|player_match| player_match.team == player_match[0].team} teamB = self.player_matches.select {|player_match| player_match.team != player_match[0].team} teamAPoints = teamA.sum {|player_match| player_match[:points]} teamBPoints = teamB.sum {|player_match| player_match[:points]} if teamAPoints > teamBPoints teamA[0].team else teamsB[0].team end end endOne way to get the value
.winneris by attaching the method to our table data.get '/matches' do matches = Match.order(:date) match.to_json({:methods => :winner}) endThis will include the result of the .winner method for each match with its corresponding match in the .json data being sent to the client.
You can also include data from a table that is connected the table in question. Let’s say we decided we wanted to bring data from all the instances of PlayerMatch along after all.
get '/matches' do
    matches = Match.order(:date)
    match.to_json({:include => :player_matches})
end
In this case, all of the instances of PlayerMatch related to a given match will be packaged together with the data for that match in the .json data.
This approach works, but it is still pretty inefficient. You’re getting data on all the winners when you first request the match data. You might not ever need to know who any of the winning teams are, let alone who all the winning teams are.
Method-specific routing
It would be better to set up http routing that allows the client to get the winning-team data on just the match they’re interested in, when they want it. To do this, we can set up a custom route in the application controller.
get '/matches/:id/winner' do
    match = Match.find(params[:id])
    winner = match.winner
    winner.to_json
end
If the client sends a request to this route, specifying the id of the match, it will return just the name of the team that won the match associated with that id.
It’s worth saying a bit more about the URL in this route. Notice “:id”; this is a named parameter. You can include any named parameter in the URL to further specify the data you want returned.
For example, perhaps you have a method that takes a player’s name as an argument. You then might construct a route as follows:
get '/players/:name' do value = Player.method(params[:name]) value.to_json end -
Building login functionality with React
Disclaimer: the information below should be used as an illustration only. For secure login functionality, you are best served by using a third-party authentication service, like Okta.
Saving user data in order to customize user experience is a common feature in web apps. Implementing this feature requires the ability to:
- Allow users to input a username and password combination
- Check that combination against the combinations associated with user data in a database
- If the combination is found, the user data is stored in a state and used to customize user experience
- If the combination was not found, the user would be alerted that the combination was incorrect and the user would not be able view user data
I’m going walk through two different ways to build out this feature using React. The first method only makes use of state while the second uses the browser’s session storage to hold a login token.
Initial components
First, let’s build the login component:
import React from "react";

function Login() {

    return(
        <form>
            <div>
                <label htmlFor="username">Username</label>
                <input type="text" name="username" />
            </div>
            <div>
                <label htmlFor="password">Password</label>
                <input type="password" name="password" />
            </div>
            <div>
                <input type="submit" value="Login"/>
            </div>
        </form>
    );
}

export default Login;
Note the use of
htmlForin place of for: the use offoris reserved in Javascript, so React useshtmlForin its place.Next, we’ll add in an event listener to handle form submission:
import React from "react"; function Login({ login }) { function handleSubmit(e) { e.preventDefault(); const username = e.target.username.value; const password = e.target.password.value; return login(username, password); }; return( <form onSubmit={handleSubmit}> <div> <label htmlFor="username">Username</label> <input type="text" name="username" /> </div> <div> <label htmlFor="password">Password</label> <input type="password" name="password" /> </div> <div> <input type="submit" value="Login"/> </div> </form> ); } export default Login;handleSubmitreturnslogin, a function that ‘s been passed into the component as a prop, with the input username and password as arguments.Next we need to build the
loginfunction itself. For the sake of simplicity, I’ll let theAppcomponent be the immediate parent of theLogincomponent:import React, { useState, useEffect } from "react"; import Login from "/Login.js" function App() { const [userData, setUserData] = useState(); useEffect(() => { return fetch("http://localhost:3000/users") .then((response) => response.json()) .then((data) => setUserData(data); }, []); function login(username, password) { const userMatch = userData.find((user) => user.username === username && user.password === password); userMatch ? console.log("Login successful") : console.log("Incorrect combination"); }; return ( <div> <Login login={login} /> </div> ); }; export default App;There are a few things to note here.
First, this assumes a particular structure to
userData, one that holds the username and password as top-level properties of the user object. You might need to make adjustments depending on the structure of the user objects you’re working with.Second, the
userDatais fetched inside of auseEffecthook. This is to prevent the data from being fetched every timeApprenders; we really only need the data pulled when the app first loads. Furthermore, sinceAppwill render every timesetUserDatais called, this would cause the fetch to be called over and over again ad infinitum...not desirable. You can read aboutuseEffectHERE.Third, the specific implementation of the different login methods will replace the concluding ternary operation in
login.State method
The first method we’ll look at is the simpler of the two. In this method, when there is a match for the username/password combination, we store the matching user object in its own state:
import React, { useState, useEffect } from "react";
import Login from "/Login.js"

function App() {

    const [userData, setUserData] = useState();
    const [currentUser, setCurrentUser] = useState():

    useEffect(() => {
        return fetch("http://localhost:3000/users")
        .then((response) => response.json())
        .then((data) => setUserData(data);
    }, []);

    function login(username, password) {
        const userMatch = userData.find((user) => user.username === username && user.password === password);
        userMatch ? setCurrentUser(userMatch) : console.log("Incorrect combination");
    };

    return (
        <div>
            <Login login={login} />
        </div>
    );
};

export default App;
Any time the app needs to be tailored to the user, the relevant data can be pulled from
currentUser. This method also makes for an extremely simple logout function:function logout() { return setCurrentUser(); };Since calling
setCurrentUserwill causeAppto re-render, this will clear any user data that is on display.The problem of client-side routing
If you’re implementing a login feature in your app then there are likely components in your app you don’t want users to see unless they’re logged in. In a simple app, this is not an issue: just don’t load components when
currentUseris undefined.But if you’re using client-side routing, your users could access components using the relevant path. This might result in them stumbling into components that will appear broken when they aren’t logged in. To prevent this, you can re-route users to the login component:
import React from "react";
import { Redirect } from "react-router-dom";
import UserCard from "/UserCard.js";

function PersonalInfo({ currentUser }) {

    if (currentUser) {
        return (
            <div>
                <UserCard currentUser={currentUser} />
            </div>
        );
    } else {
        return <Redirect to="/login" />;
    }
};

export default PersonalInfo;
This re-route uses the
Redirecthook to accomplish the desired task. Note that for this to work, you’ll need to have created a route to the Login component. See HERE for more about React routing.The problem with refreshing
While the state method is nice and simple, it does cause a problem when users decide to refresh the app for any reason. Modern apps allow users to remain logged-in through a refresh, but the state method won’t do that.
When the app is refreshed,
currentUseris reset to undefined, immediately logging the user out. This is annoying to the user, so an alternate method is desirable.Session storage method
One way to allow for a login that persists through a refresh is to utilize the browser’s system storage. Browsers have a simple web storage api built in to allow apps to store data locally to improve user experience: just what we’re looking for!
For this method, we’re going to create a unique token, store that token as a property in the user object in the database as well as storing it in session storage, and then checking the session storage token against the user tokens whenever the app loads.
Note that we’ll be creating a unique token rather than using the user’s username/password combination. Session storage can be accessed using the browser’s dev tools, so storing a password there would not be secure.
First, let’s create our unique token:
import React, { useState, useEffect } from "react";
import Login from "/Login.js"

function App() {

    const [userData, setUserData] = useState();
    const [currentUser, setCurrentUser] = useState();

    useEffect(() => {
        return fetch("http://localhost:3000/users")
        .then((response) => response.json())
        .then((data) => setUserData(data);
    }, []);

    function login(username, password) {
        const userMatch = userData.find((user) => user.username === username && user.password === password);
        If (userMatch) {
            setCurrentUser(userMatch);
            return createToken(userMatch);
        } else {
            return console.log("Incorrect combination");
        };

    function createToken(user) {
        const tokenArr = userData.map((user) => user.token);
        let token = Math.random();
        while(tokenArr.includes(token)) {
            token = Math.random();
        }
        return postToken(token, user.id);
    };

    function postToken(token, userId) {
        return fetch(`http://localhost:3000/users/${userId}`, {
                method: 'PATCH',
                headers: {
                  'Content-Type': 'application/json'
                },
                body: JSON.stringify({token: token})
        })
        .then(() => storeToken(token, userId);
    };

    function storeToken(tokenNum, userId) {
        const tokenObj = {user: userId, token: tokenNum}
        return sessionStorage.setItem('token', JSON.stringify(userObj.token));
    };

    return (
        <div>
            <Login login={login} />
        </div>
    );
};

export default App;
We build
createTokento make the actual token. Notice that we check the random number against theuserDatato make sure no one else is currently using that token. This isn’t a perfect solution since it is conceivable that someone else has claimed that token since the last time the app fetched theuserData. I’ll leave it as an exercise for the reader to design a solution to that problem.Notice also that we are still going to use the
currentUserstate. We will continue to use that to identify which user is logged in. We will ultimately use the token to setcurrentUseron refresh.Next, we post the token to the user’s information in the database. We’ll be using this to validate the token in session storage.
Third, we store the token in session storage as an object with user and token properties.
At this point, we have the token stored where we want it, in places that won’t be affected by refreshing the app. Next we need to build a check to run each time the app loads to validate the token (when there is one).
import React, { useState, useEffect } from "react";
import Login from "/Login.js"

function App() {

    const [userData, setUserData] = useState();
    const [currentUser, setCurrentUser] = useState();

    useEffect(() => {
        return fetch("http://localhost:3000/users")
        .then((response) => response.json())
        .then((data) => {
            setUserData(data);
            validateToken(data);
        };
    }, []);

    function validateToken(data) {
        const tokenString = sessionStorage.getItem('token');
        const userToken = JSON.parse(tokenString);
        if (userToken) {
            const returningUser = data.find((user) => user.id === userToken.user && user.token === userToken.token);
            returningUser ? setCurrentUser(returningUser) :
setCurrentUser();
        } else {
            return setCurrentUser();
        }
    };
First, we call our validation function as part of the initial data loading process to take advantage of the data being returned from the fetch. This allows us to avoid some problems that arise if
userDatadoesn’t loaded before the validation check runs.Next, we build the validation function itself. In this function, we grab the token from session storage and assign it to
tokenString. Note that thistokenStringis a json string and needs to be parsed to ensure that we can use it effectively. The resulting Javascript object is attached to theuserTokenvariable.If there was a token in session storage, we then check it against the token stored in the data for the user identified by the token. If the tokens match, we set
currentUsertoreturningUser. If not, or if there was no token in session storage, we leave thecurrentUserundefined.Some issues
The session storage method works well except it introduces another asynchronous element into the initial app load:
sessionStorage.getItem('token').This can cause a problem when a component that redirects when
currentUseris undefined refreshes, redirecting a user who is, in fact, logged in.To solve this issue, we’ll need a state that records whether the token has been checked.
import React, { useState, useEffect } from "react";
import Login from "/Login.js"

function App() {

    const [userData, setUserData] = useState();
    const [currentUser, setCurrentUser] = useState();
    const [tokenIsChecked, setTokenIsChecked] = useState();

    useEffect(() => {
        return fetch("http://localhost:3000/users")
        .then((response) => response.json())
        .then((data) => {
            setUserData(data);
            validateToken(data);
        };
    }, []);

    function validateToken(data) {
        const tokenString = sessionStorage.getItem('token');
        const userToken = JSON.parse(tokenString);
        setTokenIsChecked(true);
        if (userToken) {
            const returningUser = data.find((user) => user.id === userToken.user && user.token === userToken.token);
            if (returningUser) {
                return setCurrentUser(returningUser);
            } else {
                return setCurrentUser();
        } else {
            return setCurrentUser();
        }
    };
The state is updated when the token is validated. Finally, we need to tweak our redirect:
import React from "react";
import { Redirect } from "react-router-dom";
import UserCard from "/UserCard.js";

function PersonalInfo({ currentUser, tokenIsChecked }) {

    if (tokenIsChecked) {
        if (currentUser) {
            return (
                <div>
                    <UserCard currentUser={currentUser} />
                </div>
            );
        } else {
            return <Redirect to="/login" />;
        }
    } else {
        return (
            <div>
                <h1>Loading...</h1>
            </div>
        );
    }
};

export default PersonalInfo;
So long as
tokenIsCheckedis falsey, the component will just show “Loading…”. OncetokenIsCheckedbecomes true, the original component or redirect will load.Finally, logging out using the session storage method is only slightly more complicated than it is using the state method.
function logout() {
    sessionStorage.clear();
    setTokenIsChecked(false);
    return setCurrentUser();
};
Conclusion
For many apps, using the simpler state method for your login feature will likely be sufficient. If, however, you want to create a more user-friendly experience, you might consider using session storage.
On last note: I know next to nothing about web security. It could well be that using session storage to save a login token compromises the security of your app. So, discretion is advised.
-
Persistent path-specific styling in React
The situation: you’re building a single-page application in React using client-side routing.
The goal: to apply styling to an element as long as a user is on a particular “page”.
Imagine that you have a navigation bar across the top of your app with navlinks to the app’s various “pages”. You want the navlink for the current page to stand out so users can quickly see where they are in the app.

The simplest way to deal with this is to apply conditional styling to the navlink when the navlink is active.
.navlink {
    display: inline-block;
    padding: 12px;
    margin: 0 6px 6px;
    background: #3cc47c;
    text-decoration: none;
    color: white;
}

.navlink:active {
    background: #1e392a;
}
The problems: first, if a user navigates to a page through some means other than clicking on the navlink, the navlink will not become active. Second, if the user refreshes the page, the navlink will cease to be active.
The solution: The
useLocationhook returns information about the app’s current path. Once you have that, it is a simple matter to conditionally add classes to the navlinks.import React from "react"; import { NavLink, useLocation } from "react-router-dom"; import './Banner.css'; function Banner() { return ( <div className="main"> <NavLink id="home" to="/" exact className={useLocation().pathname === "/" ? "navlink active" : "navlink"} > Home </NavLink> <NavLink id="characters" to="/characters" exact className={useLocation().pathname === "/characters" ? "navlink active" : "navlink"} > Characters </NavLink> <NavLink id="spells" to="/spells" exact className={useLocation().pathname === "/spells" ? "navlink active" : "navlink"} > Spells </NavLink> </div> ); }; export default Banner;.navlink { display: inline-block; padding: 12px; margin: 0 6px 6px; background: #3cc47c; text-decoration: none; color: white; } .active { background: #1e392a; }And that’s it: you’ve got conditional styling that applies to an element so long as the user remains on a particular page.
-
Promise chains and Promise.all
Promises are a central component of asynchronous JavaScript. While the promise provides instructions for what to do when a given task completes, the rest of your code can chug merrily along without interruption or delay.
For example, I might want to fetch a large chunk of data from some API when my code first initiates. This might take a bit of time and I don’t want that to get in the way of the rest of my code, e.g., assigning event listeners to elements on a web page and the like. So,
fetch()returns a promise that, if nothing goes wrong, is fulfilled. When it’s fulfilled, it returns a response from the API that is then available for further use.Getting ahead of yourself
Since that promise might take a bit of time to fulfill, if you have further code that attempts to utilize the data from the
fetch(), it is likely to throw an error or deliver an undesired result.function fetchStuff(url) { return fetch(url, { headers: { Accept: "application/json" } }); }; const cardArray = []; fetchStuff("https://netrunnerdb.com/api/2.0/public/cards") .then((response) => { return response.json(); }) .then((result) => { return cardArray.push(...result.data); }); console.log(cardArray);In this code, when
fetchStuff()is called, it returns a promise. When that promise is fulfilled, it spreads the data returned from the API tocardArray(what’s going on with those.thens? More on them in a bit).I want cardArray, filled with data from the
fetch()request, to get logged in the console.But, what I get is an empty array.

Empty array The problem here is that my
console.log(cardArray)grabbedcardArraybefore the promise fromfetch()was fulfilled and, thus, before the data from the API was spread tocardArray.Promise chains
To achieve my desired result, I can include my
console.log()inside the promise chain.When a promise is created, you can use
.thento pass the data returned upon fulfillment of the promise to a function as an argument. Indeed, in the above code, I’ve already used this method to convert the data from the API into a usable format withresponse.json()and then passed the result of that on to be spread intocardArray.I simply need to add a new link in that chain.
.
.
.

fetchStuff("https://netrunnerdb.com/api/2.0/public/cards")
.then((response) => {
    return response.json();
}).then((result) => {
    return cardArray.push(...result.data);
}).then(() => {
    return console.log(cardArray);
});
Here
responseis the raw data returned from thefetch(), which is processed into a usable format byresponse.json()and then, in that new format, passed to the next link in the promise chain as an argument,result, where it gets spread tocardArray. In the last link in the chain,console.log(cardArray)is called and, since this link in the chain is only activated once the previous links are complete,cardArrayis sure to include the data from the API.Note that
cardArray.push(...result.data)creates a new array, replacing the array previously assigned tocardArray, and returns the length of the new array. Since the function in the last link of the chain takes no arguments, this returned value isn’t passed along to it.Dependent promises
Things get a bit trickier when I’m waiting on two promises to be fulfilled and I want to complete a single task using the data from both. For example, maybe I want to combine the data from both promises into a single array. I might try to accomplish this as follows:
.
.
.

function combineArrays(array1, array2) {
    const combinedArrays = [...array1, ...array2];
    return console.log(combinedArrays);
};

const cardArray = [];

fetchStuff("https://netrunnerdb.com/api/2.0/public/cards")
.then((response) => {
    return response.json();
}).then((result) => {
    return cardArray.push(...result.data);
});

fetchStuff("https://netrunnerdb.com/api/2.0/public/prebuilts")
.then((response) => {
    return response.json();
}).then((result) => {
    const deckArray = [...result.data];
    return deckArray;
}).then((result) => {
    return combineArrays(cardArray, result);
});
Here there are two
fetch()requests occurring and, as the final chain in the second promise chain, the data from the firstfetch(), which is ultimately spread tocardArray, is combined, usingcombineArrays(), with the data from secondfetch(),result.The problem with this is that you get the wrong result some of the time.
The array returned from the first
fetch()has a length of 2119. The array returned from the secondfetch()has a length of 6. So, when things work as I want, the resulting array has a length of 2125 . As you can see, that doesn’t always happen.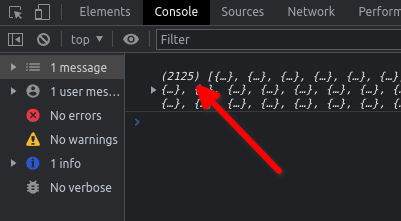
A success! 
A failure 😦 What causes this bug?
The time it takes for fulfillment of a promise is not constant. Sometimes it takes a bit more time and sometimes a bit less. When the first
fetch()is speedy and beats the secondfetch(), the data is ready incardArraywhencombineArrays()is called. But when the firstfetch()has even a bit of lag, the secondfetch()completes first andcardArrayis still empty whencombineArrays()is called.In this case, that happens about 10% of the time.
setTimeout
One solution to this problem would be to remove the
combineArrays()from the promise chain and instead delay when that function is called by, oh, say one second.. . . fetchStuff("https://netrunnerdb.com/api/2.0/public/prebuilts") .then((response) => { return response.json(); }).then((result) => { return deckArray.push(...result.data); }); setTimeout(() => { return combineArrays(cardArray, deckArray); }, 1000);Using
setTimeout(), thecombineArray()function call is delayed until enough time has elapsed for both promises to have resolved.This is not, however, ideal. First, one second is kind of arbitrary. Why not half a second? Why not two seconds? This is not a principled solution. Second, there is no guarantee that the amount of time you pick for the delay will always be enough, so you may not have eliminated the bug completely. Third, if you do eliminate the bug completely then, at least some of the time, you will delay the function call unnecessarily, increasing the load time of your code.
There has to be a better way!
Promise.all
There is! A better solution involves the use of
Promise.all. This method bundles all the designated promises into a single, new promise. You can then include your desired function in the new promise chain.In order to use this method, you need to assign you original promises to some variable. You then reference those promises with those variables when you implement
Promise.all.. . . const deckArray = []; const cardArray = []; const fetchCards = fetchStuff("https://netrunnerdb.com/api/2.0/public/cards") .then((response) => { return response.json(); }).then((result) => { return cardArray.push(...result.data); }); const fetchDecks = fetchStuff("https://netrunnerdb.com/api/2.0/public/prebuilts") .then((response) => { return response.json(); }).then((result) => { return deckArray.push(...result.data); }); Promise.all([fetchCards, fetchDecks]) .then(() => { combineArrays(cardArray, deckArray); });Here the promises from the first and second
fetch()requests are assigned tofetchCardsandfetchDecksrespectively. Those promises are then bundled together inPromise.alland, in the subsequent promise chain,combineArrays()is called when the bundled promise is completely fulfilled, no sooner and no later.In fact, this method lets us eliminate the global variables entirely, in keeping with the principles of functional programming:
.
.
.

const fetchCards = fetchStuff("https://netrunnerdb.com/api/2.0/public/cards")
.then((response) => {
    return response.json();
}).then((result) => {
    return result.data;
});

const fetchDecks = fetchStuff("https://netrunnerdb.com/api/2.0/public/prebuilts")
.then((response) => {
    return response.json();
}).then((result) => {
    return result.data;
});

Promise.all([fetchCards, fetchDecks])
.then((values) => {
    const combinedArray = [...values[0], ...values[1]];
    return console.log(combinedArray);
});
The data the argument that gets passed into the function inside
.then(),values, is an array with two elements: the first is the final value returned byfetchCardsand the second is the final value returned byfetchDecks.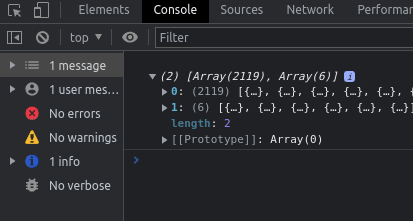
The array of values. 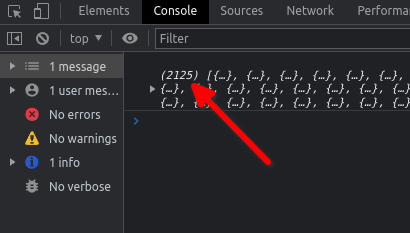
Successfully combined! So,
[...values[0], ...values[1]]is an array with the final returned value of the firstfetch()and the final value of the secondfetch()spread to it. Not only did we eliminate the global variables, we also did away with thecombineArrays()function!Conclusion
Working with promises, promise chains, and
Promise.allcan be a bit difficult at first. There’s a lot to keep tabs on and it’s easy to get lost in all those chains. But after some practice, you’ll find these to be powerful tools in your toolbox. -
Passing functions as arguments v. invoking functions in arguments
JavaScript functions can take all sorts of things as arguments: numbers, strings, arrays, objects…even other functions. A function passed to another function as an argument is a callback function. This is, however, distinct from invoking a function in an argument.
Let’s say we have a function,
roll, which simulates rolling asides-sided diethrows-number of times and summing the result:function roll(throws, sides) { let result = 0; for (let i = 0; i < throws; i++) { let seed = Math.random(); while (seed === 0) { seed = Math.random(); } result = result + Math.ceil(seed * sides); } return result; }Now let’s say we have an object,
RATHGAR. We want to assignRATHGARa property with a key ofstrand a value determined by simulating rolling a six-sided die three times and summing the results. We might do so in the following way:function strAssign(character, method) { character.str = method(); } strAssign(RATHGAR, () => roll(3, 6));This approach uses a callback function since the anonymous function that is passed into
strAssignas an argument callsrollwhen it is invoked bymethod().Another way to get the same result would be to invoke
rollin the argument itself:function strAssign(character, value) { character.str = value; } strAssign(RATHGAR, roll(3, 6));In this case, when
strAssignis invoked,rollis invoked as well and the return value ofrollis passed intostrAssign.These two approaches give the same result in this case but that doesn’t mean they’re identical. To see the difference between the two, let’s say we have an array,
ABILITIES, and we want to use that array to populateRATHGARwith keys. For each item we pull from the array as a key, we want to use our functionrollto determine the key’s value. We might try to do so as follows:const ABILITIES = ['str', 'int', 'wis', 'dex', 'con', 'chr']; function statAssign(character, stats, method) { for (const STAT of stats) { character[STAT] = method; } } statAssign(RATHGAR, ABILITIES, roll(3, 6));Here we’ve invoked
rollin the argument, but if you check the properties ofRATHGARyou’ll find that each key, e.g.,stranddex, has been assigned the same value. With this approach,rollis only invoked once and its return value is then passed intostatAssignwhere it is used multiple times.If, on the other hand, we employed
rollas a callback function, this problem is solved:function statAssign(character, stats, method) { for (const STAT of stats) { character[STAT] = method(); } } statAssign(RATHGAR, ABILITIES, () => roll(3, 6));By using
rollas a callback function, it is passed intostatAssignand invoked multiple times bymethod(). Consequently, a different random value is assigned to each key inRATHGAR. -
Back at it
I’ve spent the last month teaching two summer courses and that’s eaten up most of my time. Now I’m trying to get back into the swing of things and I now see the importance of coding often: I’ve grown rusty. I’ll be spending several hours a day between now and the start of my Flatiron classes (only a week away) trying to get back up to speed.
-
Subscribe
Subscribed
Already have a WordPress.com account? Log in now.
